Schlage Encode Manual

Front view of a Schlage Encode smart WiFi deadbolt with a keypad, featuring the Schlage logo at the top, and a keyhole at the bottom, with the words "Schlage Encode" and "Quick Start Guide" below.
Technical diagram of alarm system parts including backup key, touchscreen assembly, bolt, backplate, battery cover, inside assembly, strike and reinforcement plate, reinforcement strike, reinforcement screws, backplate screws, and various screws and hardware for assembly.
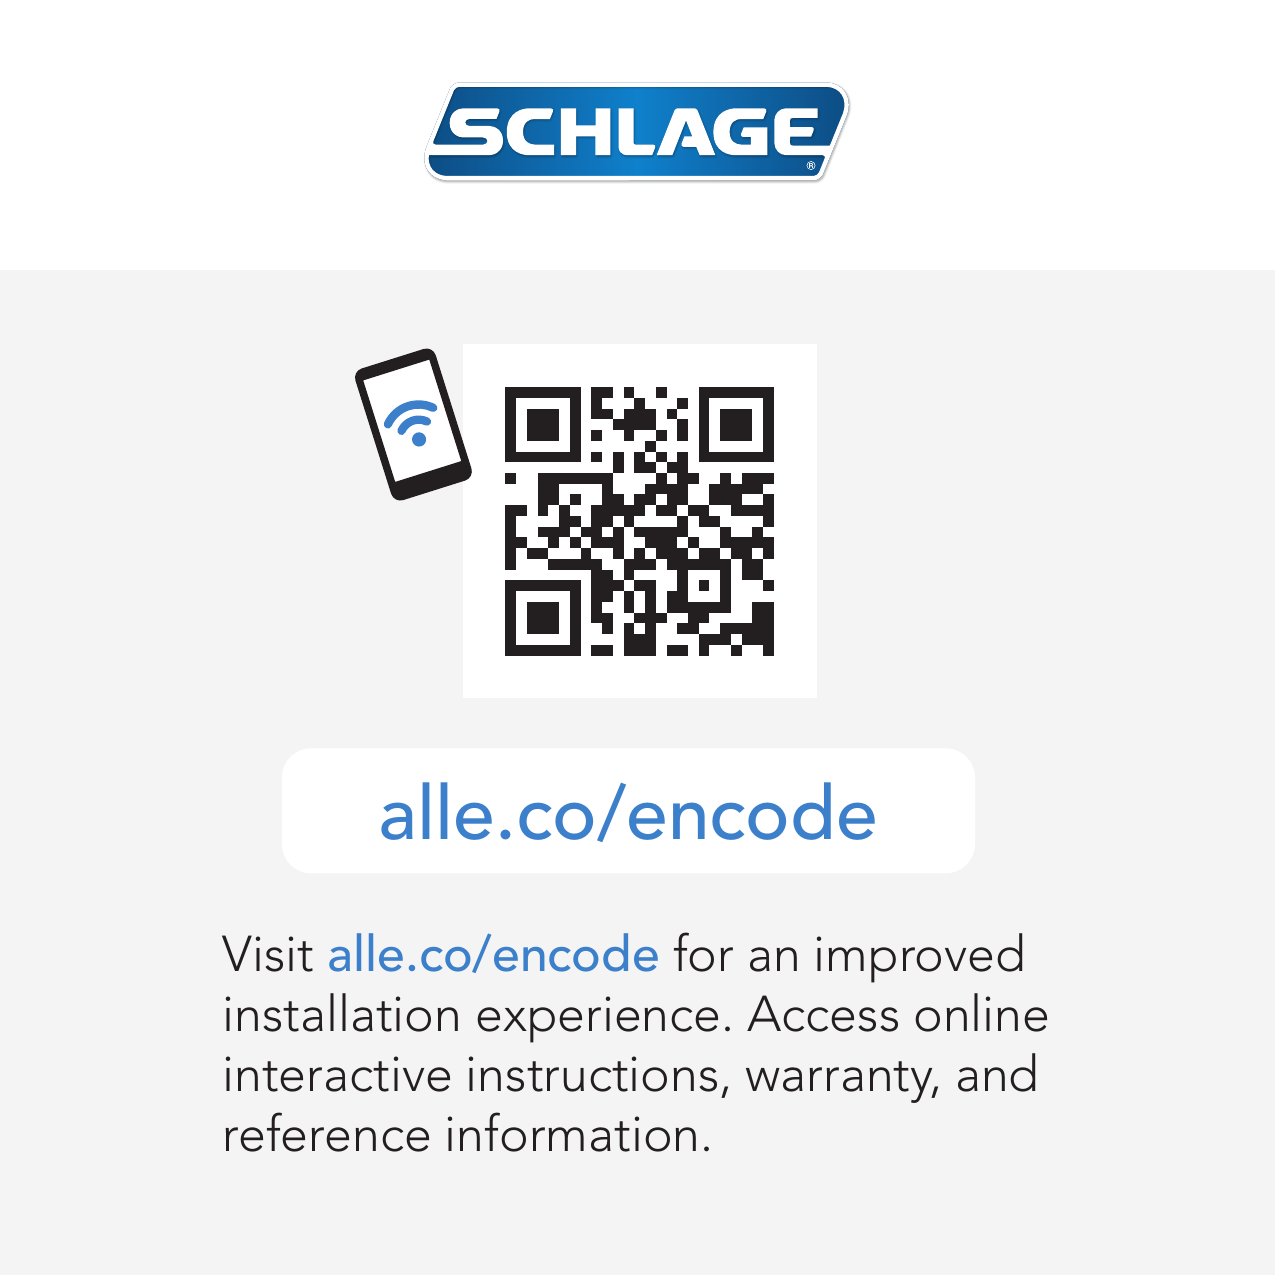
Schlage logo at the top of the image, QR code with a Wi-Fi symbol on a smartphone icon next to it, and the URL alle.co/encode with instructions to visit for installation and reference information.
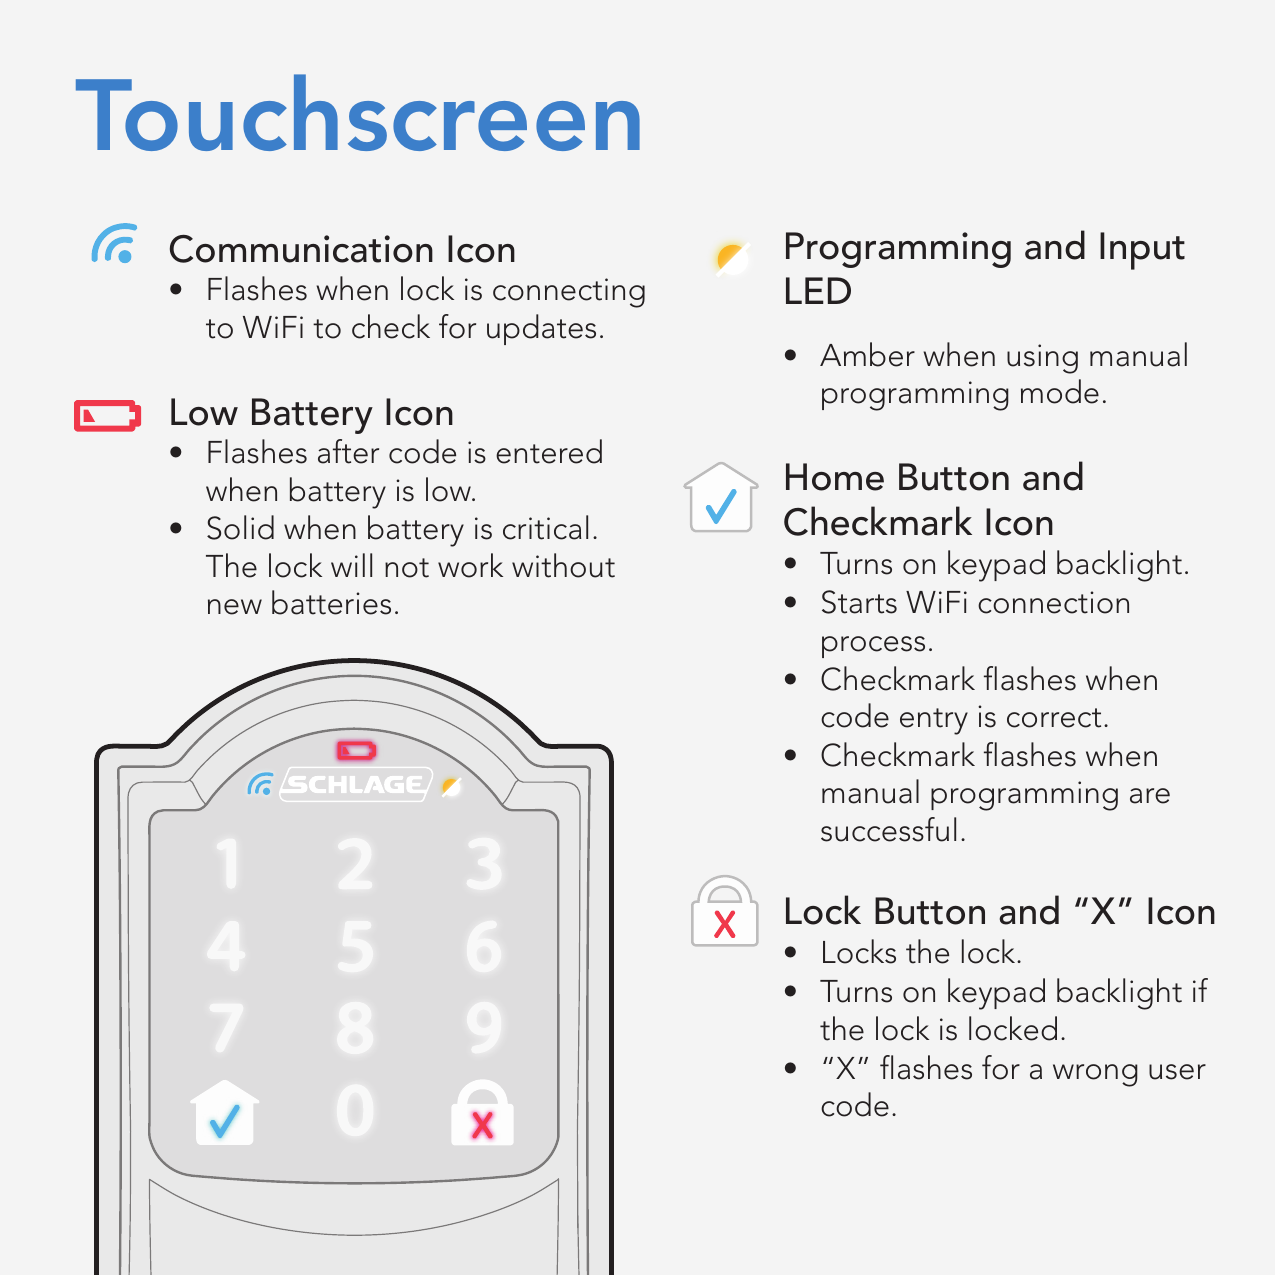
A diagram of a touchscreen device with labeled icons and buttons. The communication icon is a blue Wi-Fi symbol that flashes when connecting to Wi-Fi. The low battery icon is red and flashes when a code is entered with low battery and is solid when critical. The programming and input LED is yellow. The home button and checkmark icon is a blue checkmark inside a house shape, turning on the keypad backlight, starting Wi-Fi connection, and flashing when code entry is correct or manual programming is successful. The lock button and 'X' icon are red, locking the lock, turning on keypad backlight if locked, and flashing for a wrong user code.
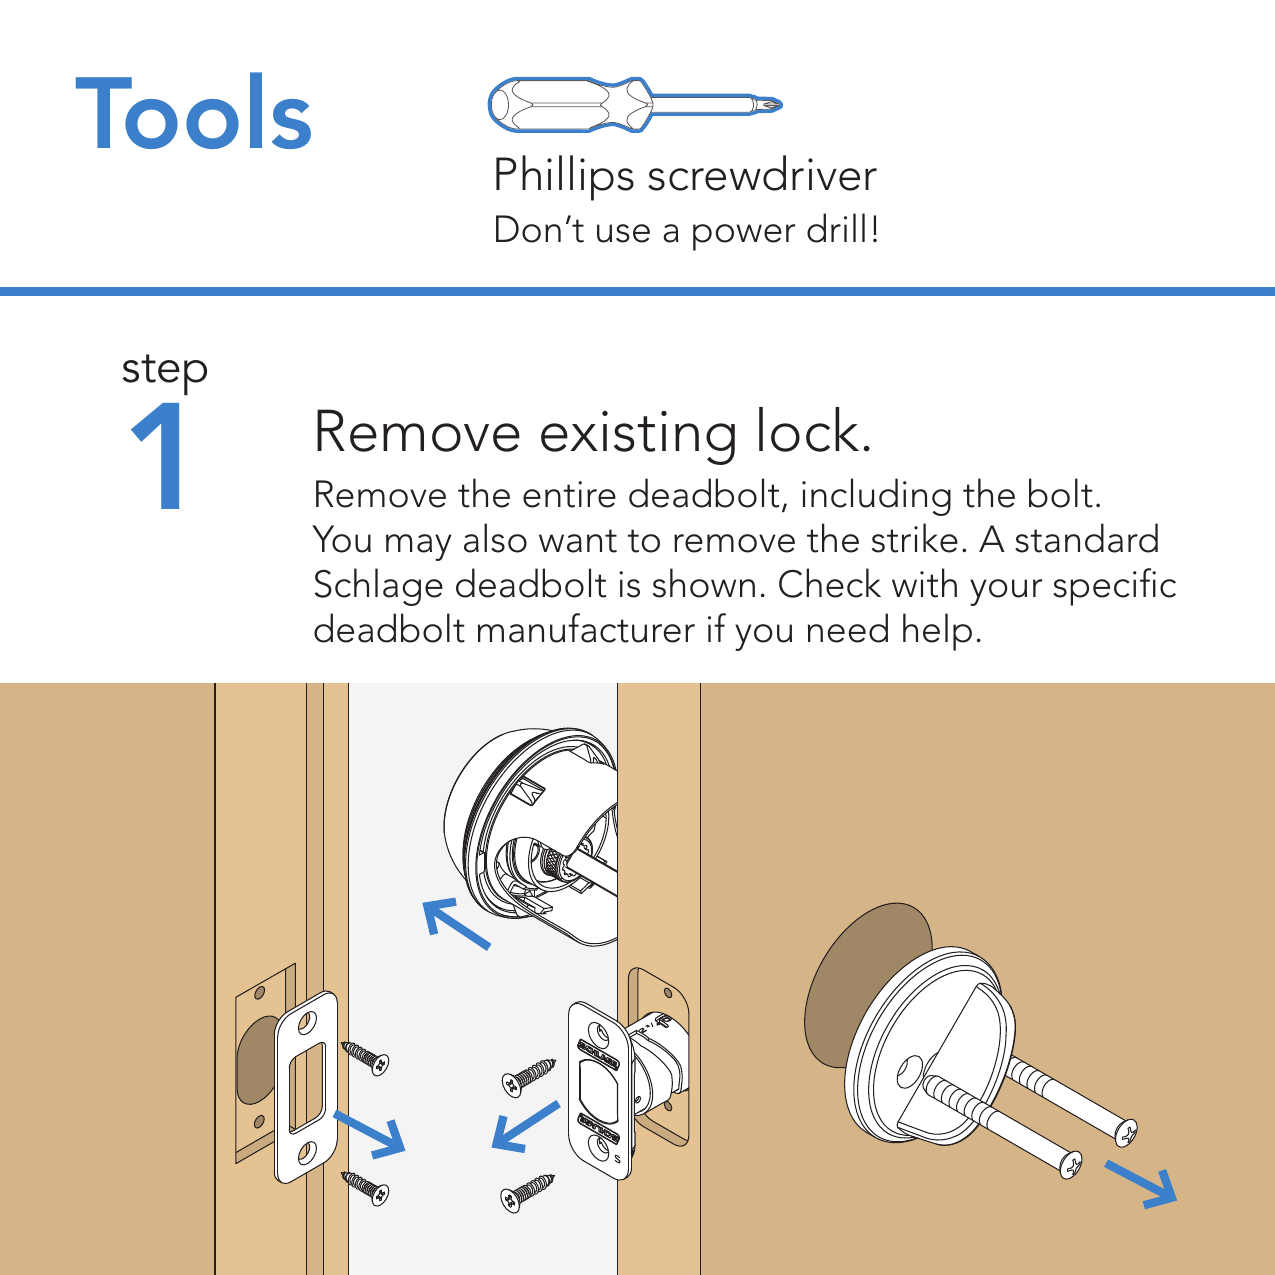
Instruction sheet for removing a lock from a door, showing step 1 to remove the existing lock and a diagram of a screwdriver and lock assembly.
Instruction guide for installing a door latch, showing step 2: install the bolt, aligning the faceplate with the hole, ensuring the word 'TOP' faces up, and tightening until 2¾ inches.
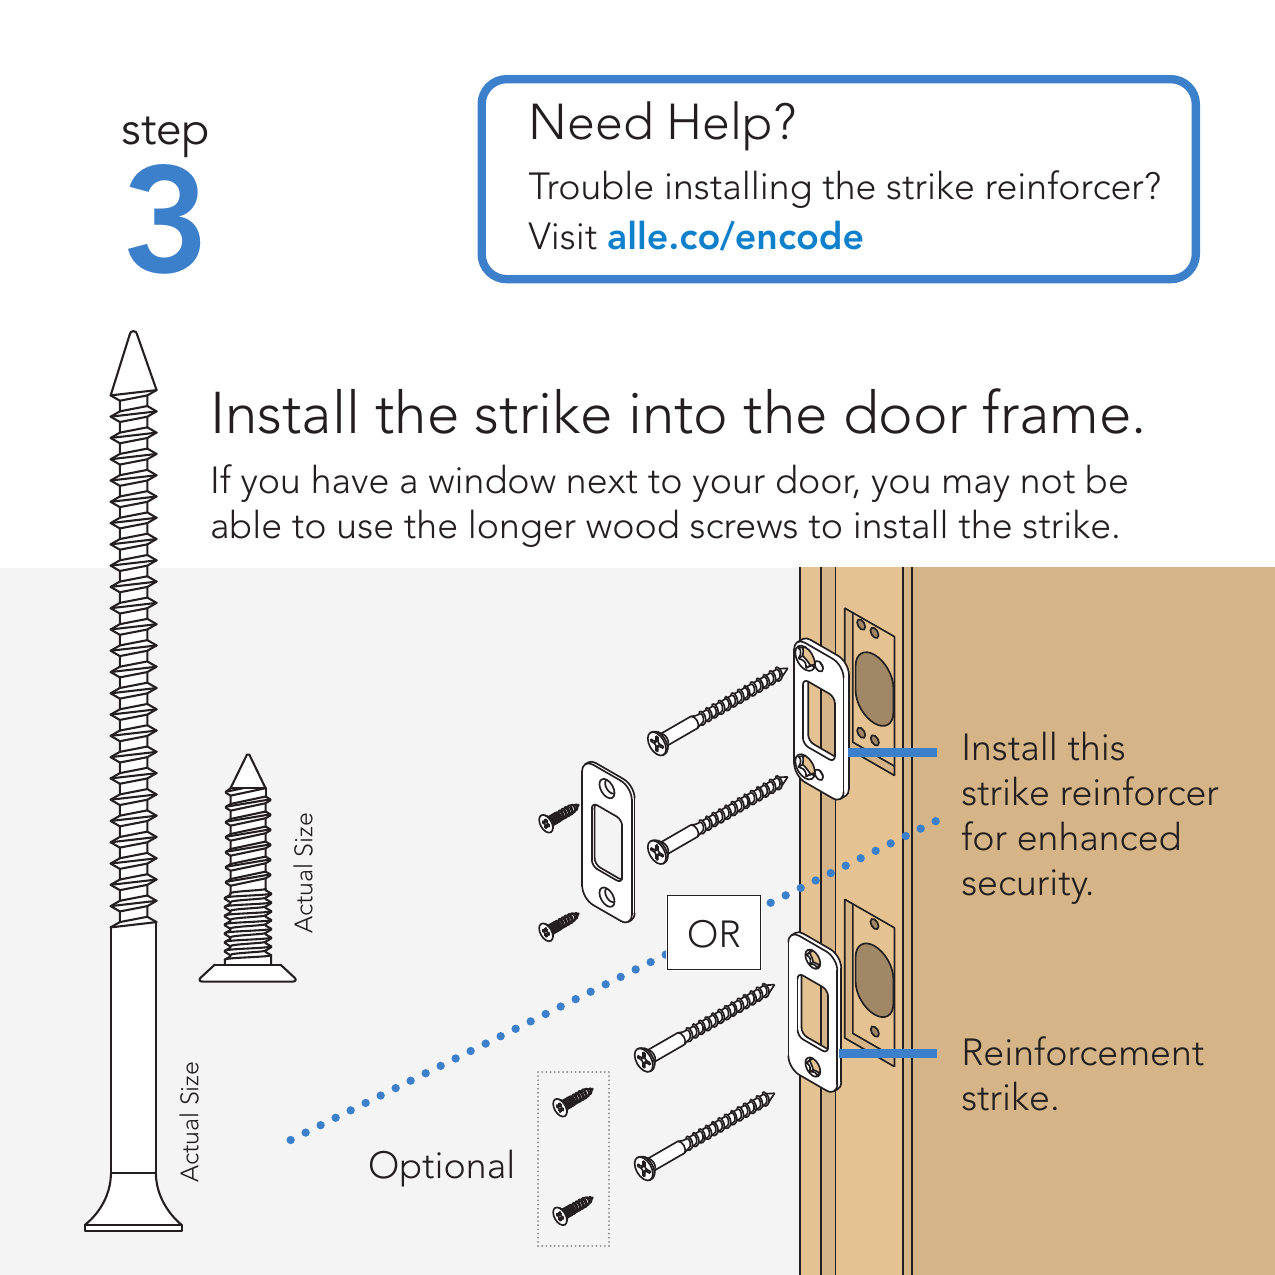
A step-by-step instructional diagram showing how to install a strike into a door frame, including illustrations of different screw sizes, a strike reinforcement, and reinforcement strike on the door frame with a note about security enhancement.
Step 4 of a touchscreen installation guide showing a diagram of routing a cable through a door below the bolt, aligning the bump on the tailpiece with the slot in the bolt.
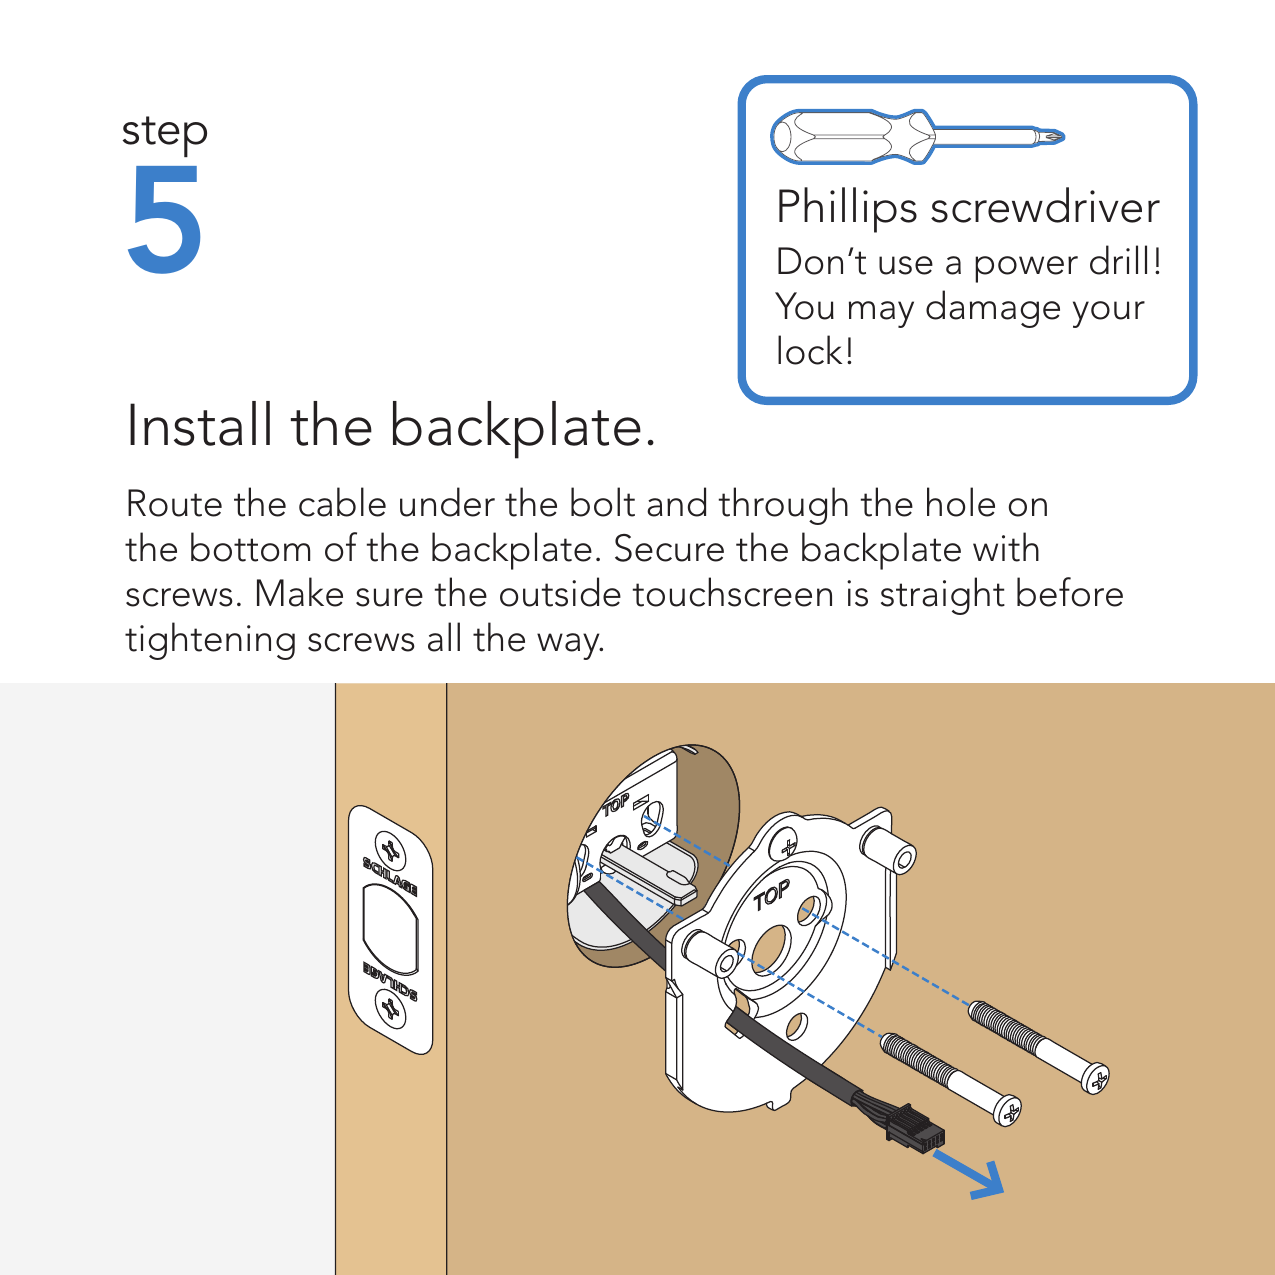
Step 5 in a how-to guide showing an illustration of a backplate being assembled with screws and a cable routed through holes, along with a warning box advising not to use a power drill to avoid damage.
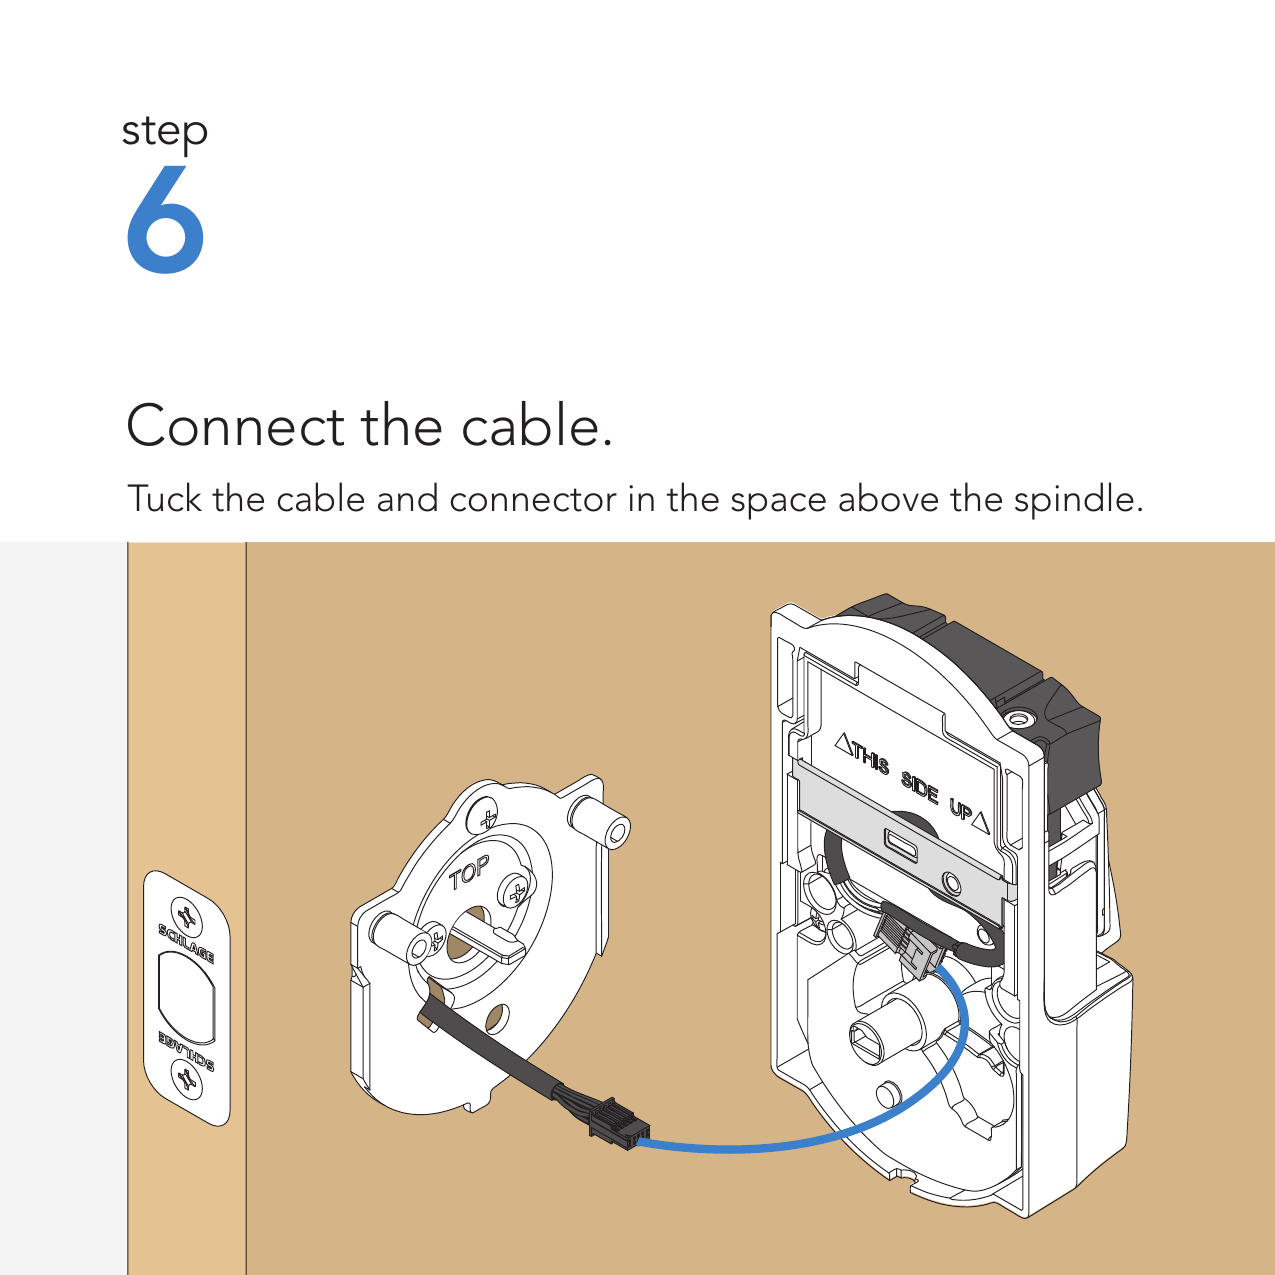
Step 6 of an assembly guide showing how to connect a cable to a device, with an illustration of the cable being plugged into the device.
Step 7 of a lock installation or adjustment guide, showing how to secure the lock to the door. Includes a diagram of the lock assembly with a focus on the bump on the tailpiece aligning with a slot in the back of the inside assembly. A magnified inset shows the bump on the tailpiece being inserted into the slot. An illustration of a Phillips screwdriver indicating not to use a power drill to avoid damage.
Step-by-step instructions on installing batteries and sliding the cover on a device, including pulling out the battery holder, installing batteries, and reattaching the cover.
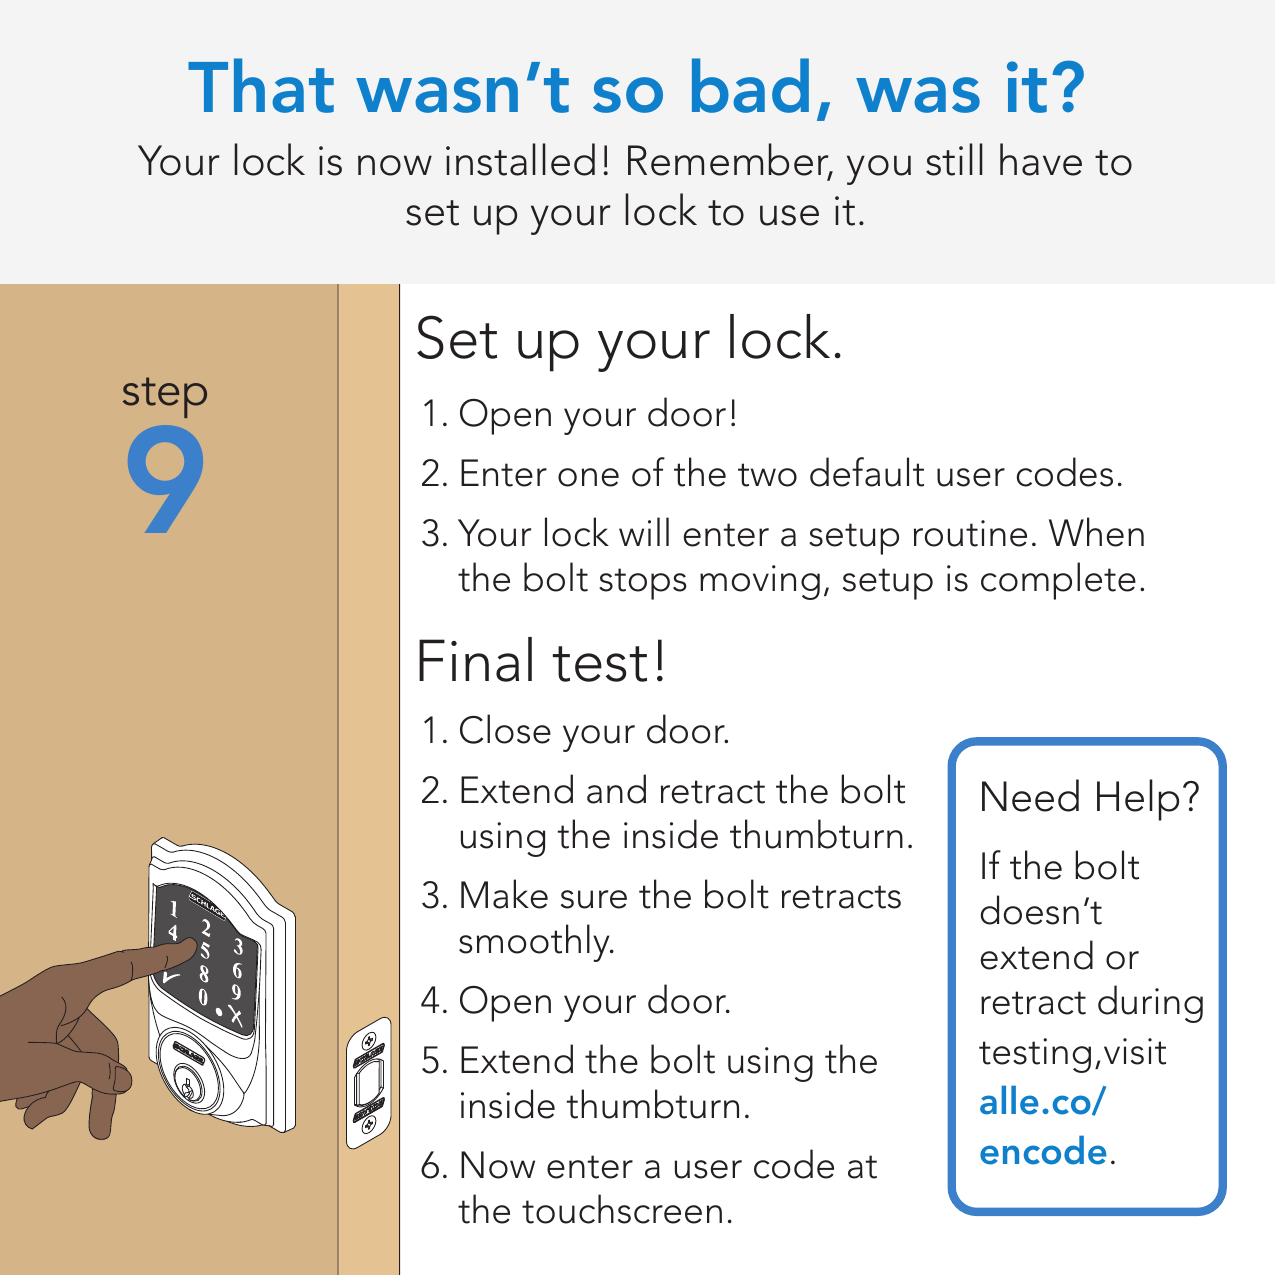
Instruction guide for setting up a lock, showing step 9 with a diagram of a hand pressing a button on a lock keypad, and a help box with a URL for assistance.
Promotional graphic for Schlage smart locks, indicating that after installation, users can control their lock with a smart home system and adding user codes for guests and household members, with a URL for more information.
Instructions for locking and unlocking a digital door lock: top section shows tapping a lock icon to lock, with a hand pressing the lock button; bottom section shows entering a user code to unlock, with a hand pressing number keys on the lock's keypad.
A label with backup codes section, a note to keep the codes safe, a message advising not to return the product to the store, a website link to alle.co/encode, and a barcode at the bottom. The label includes the Allegion logo and copyright information.